
How to Install and Test MiPBX Call Center Integration with Bitrix24
Follow this guide to successfully install and test the MiPBX Call Center application on Bitrix24.
📥 Installation Steps
1. Open Bitrix24 Marketplace
In your Bitrix24 account, navigate to the Marketplace tab.
2. Search for “MiPBX Call Center”
Type “MiPBX Call Center” in the search bar and click Install.
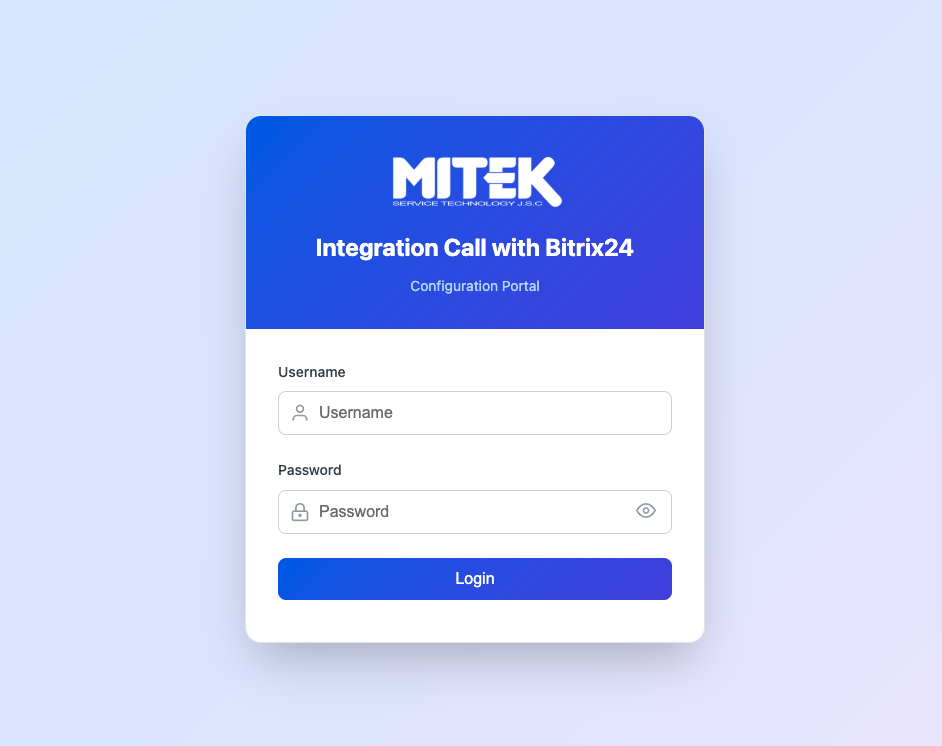
3. Log in with MiPBX credentials
Use the Username and Password provided by MITEK to log in to the app.
4. Copy the Outbound Webhook URL
After logging in, the app will display an Webhook Outbound URL. Copy this URL — it will be used for call event notifications.
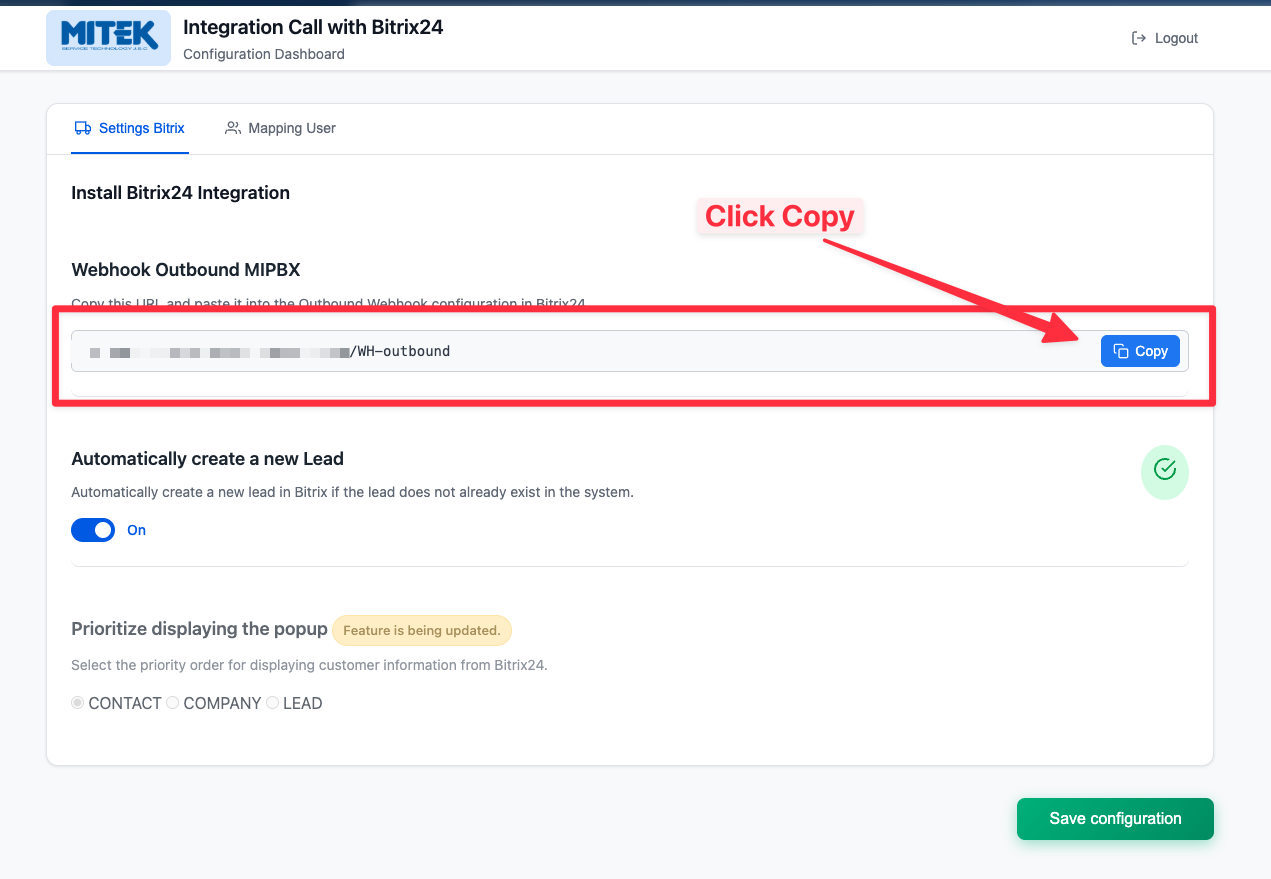
(Copy the MiPBX outbound webhook link for use in the next step)

(You need to map the extension with the MiPBX Call Center account before using the integration.)
🔗 Create and Configure Outbound Webhook in Bitrix24
1. Create an Outbound Webhook
In your Bitrix24 admin panel:
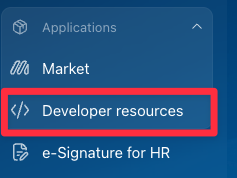
- Go to Applications → Other → Outbound Webhooks
- Click Add Webhook
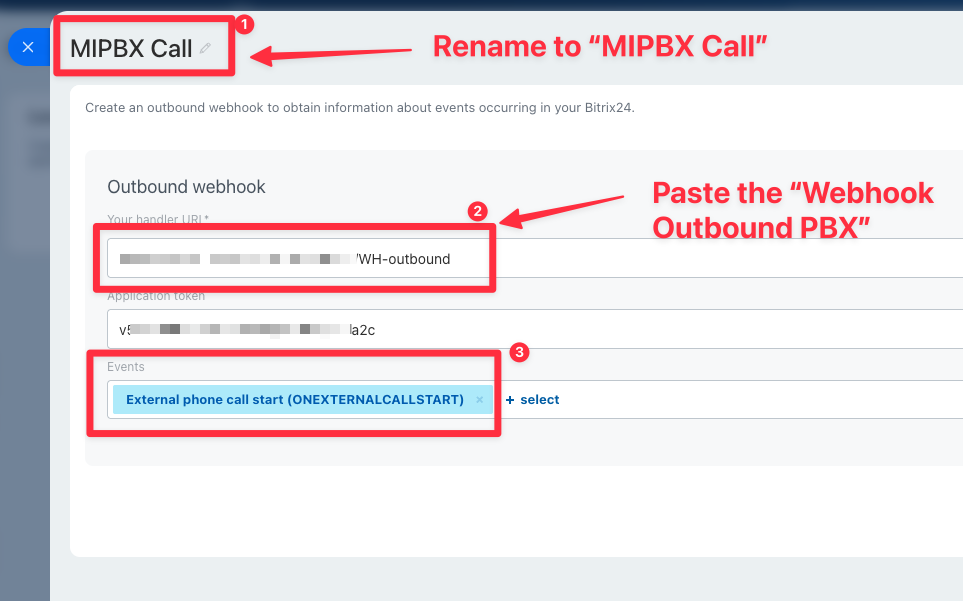
- In the webhook configuration: Set Scope to access required telephony permissions.
- In the Event Handler URL, paste the Webhook URL obtained from the MiPBX Call Center app.

2. Enable Telephony Integration
In Bitrix24:
Go to Telephony → Configure Telephony → Configure your PBX
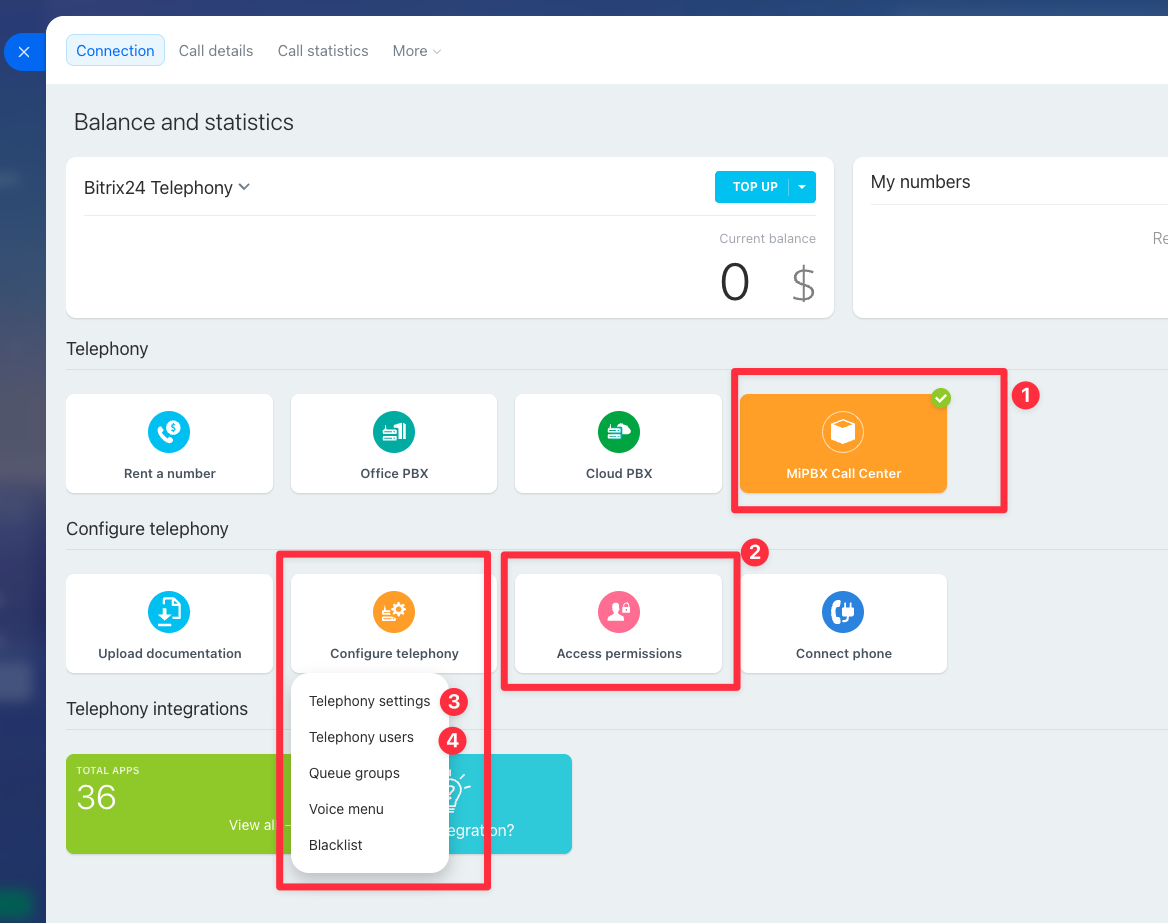
Make sure the PBX is set up correctly and the webhook is active for call event processing.
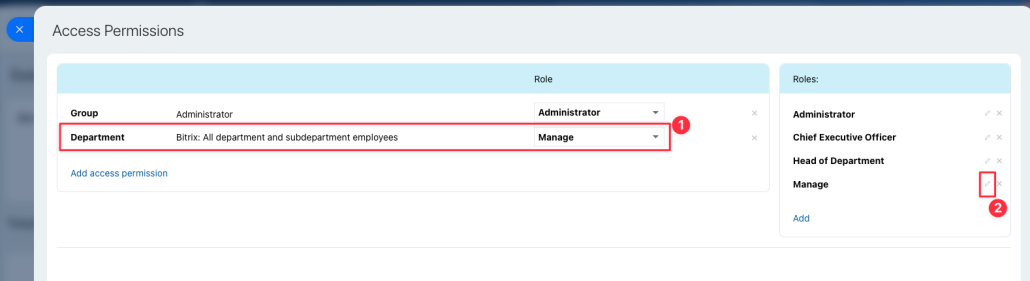
(2 -Access permisssions: Grant permission for users in the relevant department to make calls and send information through the MiPBX Call Center webhook.)
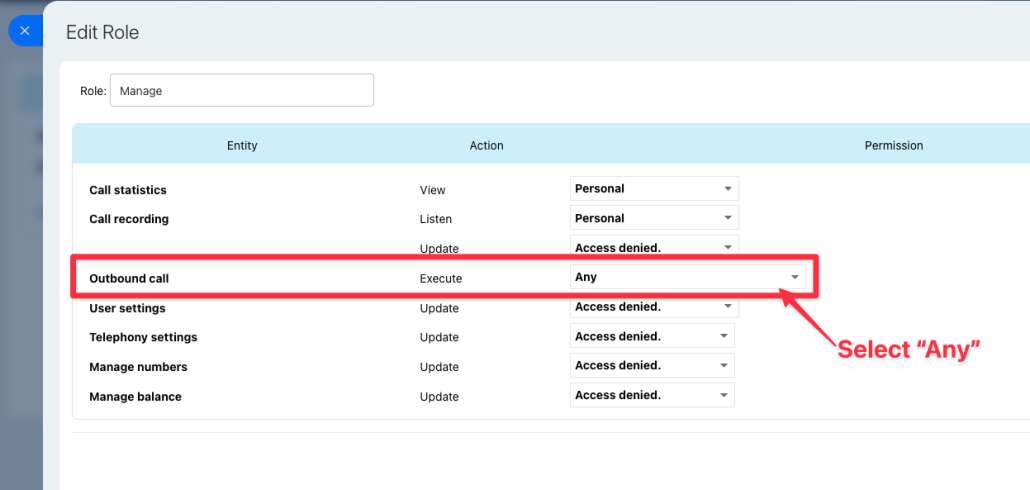
(2 -Access permisssions: Select ‘Any’ to grant permission)
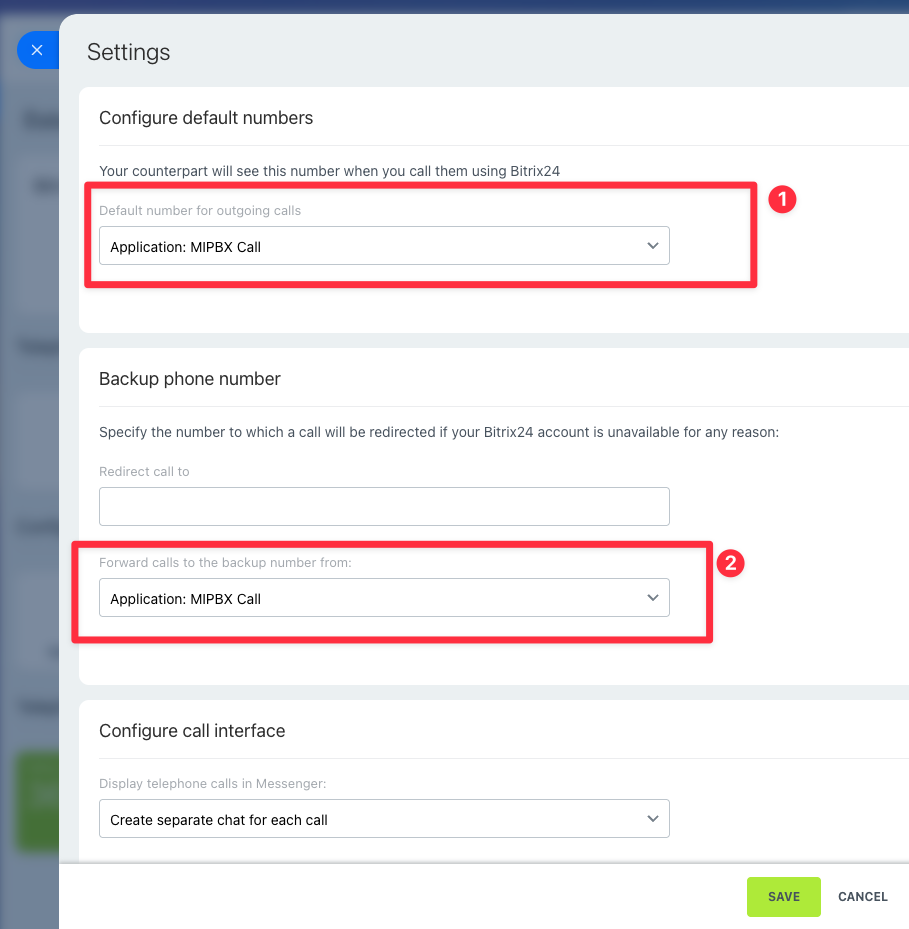
(3 – Telephony Settings : Configure Bitrix Telephony to use the MiPBX Call application.)
3. Map MiPBX Extensions to Bitrix24 Users
In the MiPBX Call Center app settings:
Map each MiPBX extension to the corresponding Bitrix24 user ID to ensure call popups and logs work correctly.
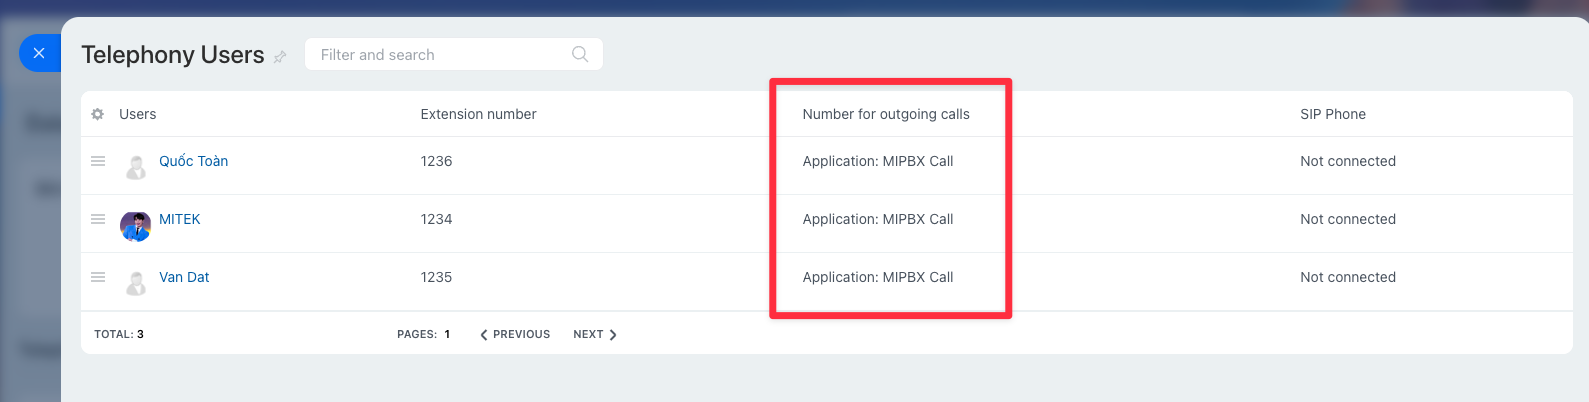
(4 – Telephony Users – Double-click to select the MiPBX Outbound Application)
📞 Simulate Call Testing (API Integration)
Use the simulation tool to test the integration without making real calls.
🔗 Simulation Tool: https://bitrix24-cti-app.mitek.vn/simulate/
🔄 Simulation Steps:
1. Enter your Bitrix24 domain
Example: mycompany.bitrix24.com
2. Enter Bitrix24 User ID
Example: 1 (must match a mapped user)
3. Enter Phone Number: Enter a number that already exists in your Bitrix24 contacts, leads, or customers
Example: 0987654321
4. Select Call Type: Choose one of the following: Inbound / Outbound
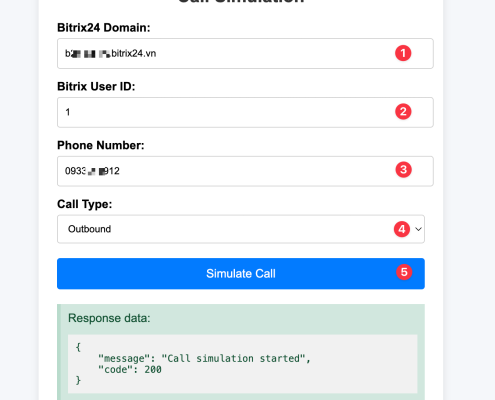
(Simulated Call Test Screen)
✅ Expected Results:
Success:
- A call popup appears in Bitrix24 (call registered)
- After 3 seconds, the popup closes automatically
- A call recording will be added to the CRM record
Failure:
- An error message is displayed
- No simulation is executed
 MiPBX là dịch vụ cung cấp hệ thống tổng đài Cloud (tổng đài ảo) cho doanh nghiệp, được triển khai theo mô hình điện toán đám mây (Cloud based PBX) giúp các doanh nghiệp triển khai một hệ thống tổng đài cho doanh nghiệp nhanh chóng và hiệu quả mà không cần phải đầu tư cơ sở hạ tầng cáp điện thoại, thiết bị tổng đài… Tất cả chỉ cần đường truyền Internet và điện thoại đầu cuối.